

how to properly maintain and clean your pool vacuum for summer 2026
A properly maintained vacuum doesn't just pick up debris—it protects your pool pump, reduces strain on your filter system, and keeps your water chemistry balanced by removing organic matter that consumes chlorine. Spending 30 minutes every month on vacuum maintenance will save you hundreds in repair costs and keep your equipment running reliably for years.
Whether you're running a suction-side cleaner, a pressure-side unit, or a robotic cleaner, these principles apply—and the timing matters more than most people realize.
Table of Contents
Our Top Picks
Affiliate disclosure: if you buy through these links, we may earn a commission at no extra cost to you.
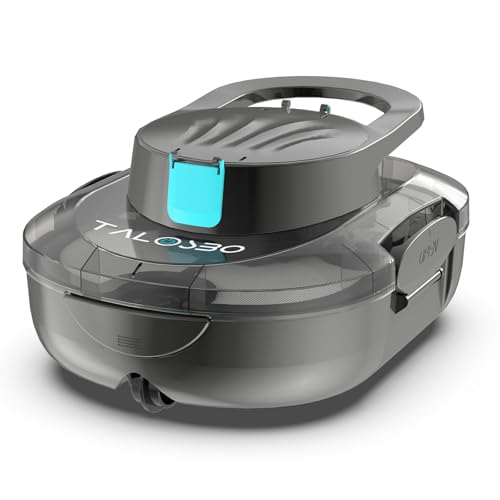



Understanding Your Pool Vacuum Type and Its Maintenance Needs
Not all pool vacuums are created equal, and the maintenance schedule depends entirely on what you're working with. Suction-side cleaners (like a basic in-ground model that connects to your pump's skimmer line) rely on your pool pump's suction power and are prone to clogging in the main drain line or hose. These are affordable but demand more hands-on attention. Pressure-side cleaners use a separate booster pump and are gentler on your main system but have their own backpressure issues to monitor. Robotic cleaners are independent units with their own motors and filters—they're the most autonomous but have more parts to inspect and clean.
The reason this matters for maintenance is simple: suction-side units will shut down if debris clogs the hose, pressure-side units can overflow if the filter basket gets too dirty, and robotic cleaners will move slowly or miss areas if their internal filters haven't been rinsed.
Before summer 2026 hits, identify which type you own and review the manufacturer's manual. Most vacuums come with a maintenance schedule you should tape inside your equipment room. If you've lost yours, contact the manufacturer or check their website—this document is worth its weight in gold.
Pre-Summer Inspection and Preparation
I recommend a full vacuum inspection in late April or early May, before you're running your equipment 24/7 all summer. Start by visually inspecting the hose for cracks, splits, or UV damage. Pool vacuum hoses degrade from UV exposure, chlorine off-gassing, and temperature cycling. If you see white or brittle spots, the hose is losing elasticity and will develop pinhole leaks that let in air (destroying suction). Replace it now rather than mid-July when you're hosting a pool party. A quality hose costs $40–80 and installs in five minutes—much cheaper than dealing with poor suction all summer.
Next, check all connection points—where the hose meets the vacuum head, where it connects to the pump intake, and any swivel joints. Tighten any loose fittings by hand. If a connection leaks, you'll lose suction and risk air entering your pump, which can cause cavitation and damage the pump impeller.
Inspect the vacuum head and bristles. If you're using a suction-side cleaner with a brush head, check that bristles aren't worn flat or cracked. Worn bristles won't scrub algae off the walls effectively, and they shed into your filter, requiring more frequent backwashing. If bristles look thin, replace the head. For pressure-side and robotic cleaners, examine wheels or treads for cracks or debris wrapped around them—sand and small rocks can wedge into wheel grooves and prevent smooth movement.
For robotic cleaners, rinse the internal filter canister thoroughly before running the unit. Even if it looks clean visually, fine dust and pollen settle during storage. Run it under lukewarm fresh water (not hot, which can shrink the foam) and gently squeeze the filter material. Dried chlorine and minerals caked on filters restrict water flow, making the unit work harder and heat up prematurely.
Weekly and Monthly Cleaning Protocols
Here's where most homeowners fail: they assume a vacuum is "set it and forget it." It's not. During summer, I recommend a weekly five-minute inspection. After your vacuum cycle completes, check the hose for visible debris or kinks. Listen for any unusual noises from the pump. Feel the hose connection points to confirm they're still tight. These micro-checks catch problems before they cascade into equipment failure.
Monthly, perform a deep hose clean. Disconnect your vacuum hose from both ends. Lay it out straight and look through it toward a light source—you're checking for algae buildup on the interior walls or debris stuck halfway through. Suction-side hoses accumulate biofilm from algae spores and bacteria. Use a flexible hose brush (they're $8–12 and worth every penny) to scrub the interior, then flush it with fresh water from a garden hose. This takes ten minutes and dramatically improves suction performance.
For suction-side cleaner skimmer baskets, empty them twice weekly during summer. Baskets fill with leaves and pollen, which reduces suction. This is where preventive maintenance collects huge dividends—a clear basket means your vacuum runs efficiently, your pump works less hard, and you use less energy. For pressure-side units, monitor the booster pump's filter basket weekly; if pressure rises above the baseline (check your gauge readings), empty the basket immediately to prevent filter overflow and debris recirculating into the pool.
For robotic cleaners, rinse the filter every 3–4 runs during peak season. If the cleaner moves slowly or seems to struggle, rinse it immediately. Use fresh water (not pool water, which recontaminates the filter with chlorine residue) and squeeze gently. Never twist or wring the filter; you'll tear the foam.
Troubleshooting Common Performance Issues
Poor suction during mid-summer? This is usually one of three issues. First, check your pool chemistry—if pH is above 7.8 or alkalinity is high, calcium buildup can clog intake lines and hose walls. Run a pool test kit (I recommend digital testers; they're more accurate than strips) and balance accordingly. Second, your pump may be cavitating due to air leaks in the intake line—any connection upstream of the pump that's not airtight will draw in air and destroy suction. Tighten all intake-side fittings. Third, your main drain or intake line may have a clogging problem. Turn off the pump, disconnect the vacuum hose, and see if water flows freely from the intake valve—if it doesn't, debris is stuck deeper in the line and you may need to backflush or clear the line manually.
Hose leaking or losing suction mid-cycle? If the hose has a pinhole leak, sealing putty won't fix it permanently (water pressure forces it out). You need a hose patch kit or full replacement. I always keep a hose patch kit on hand; they're $15 and can extend a hose's life another season while you source a replacement. However, if the leak is at a connection, tighten the fitting first. If it persists, the connection may have corroded or the rubber seal may have deteriorated—replace the fitting ($5–20) rather than the entire hose.
Robotic cleaner moves slowly or gets stuck? Check for debris wrapped around wheels and brushes first. If the cleaner is making normal noise but barely moving, the internal filter is clogged—this reduces water flow, and the unit can't generate pressure to move. Rinse the filter immediately. If it still moves slowly, the motor may be failing, which usually means replacement rather than repair (motors are often $200+, and you can replace the whole unit for $400–800 depending on model). Run it for 30 seconds every two weeks even during off-season to keep the motor active.
Vacuum leaves debris in the deep end? This is usually an issue with vacuum head design or placement, not the unit itself. Suction-side cleaners sometimes struggle to seal against sloped pool bottoms. Make sure your vacuum head is designed for your pool shape and that the hose is long enough to reach all areas comfortably. If debris collects in one spot, your vacuum pattern might be missing that zone—try running two or three shorter cycles with adjusted patterns instead of one long cycle.
Storage and Off-Season Care
Come September or October, don't just stuff your vacuum in the shed and forget about it. Proper off-season storage adds years to equipment life. For suction-side and pressure-side cleaners: drain the hose completely by disconnecting it at both ends and laying it straight or coiling it loosely. Don't kink or fold the hose tightly; this creates permanent creases that weaken the material. Store the hose indoors or in a shaded location away from direct UV—UV degradation happens even in winter if you're in a sunny climate. Store the vacuum head and any brushes in a dry location; moisture promotes mold and material breakdown.
For robotic cleaners: this is critical—rinse the unit thoroughly with fresh water, including all internal components if you can access them. Allow it to air dry completely before storage. Store it in a cool, dry location (not outdoors where temperature extremes and moisture will degrade the motor and circuit boards). Some manufacturers recommend removing the filter and storing it separately. Check your manual, but the principle is simple: no moisture and moderate temperatures extend electronic component life significantly.
Drain or bypass your pool heater and any equipment with internal water paths. Stagnant water in closed systems leads to mineral buildup and corrosion. If your pool has a heater, follow the manufacturer's winterization steps—this usually means isolating it from the circulation system and draining all internal lines. Mineral deposits inside heater
Frequently Asked Questions
How do I choose the best pool vacuum for my pool size?
Choose a pool vacuum based on your pool size and type. For larger pools, a suction-side vacuum is ideal, while smaller pools may benefit from a robotic cleaner. Ensure the vacuum is compatible with your pool's filtration system.
What is the best way to clean a pool vacuum head?
To clean a pool vacuum head, rinse it under a hose to remove debris, then use a soft brush to scrub away stubborn dirt. Avoid using harsh chemicals that can damage the material.
How often should I clean my pool vacuum during summer?
Clean your pool vacuum weekly during peak swimming season to prevent clogs and maintain optimal performance. A monthly deep clean will help prolong its lifespan and improve efficiency.
Is it worth replacing my old pool vacuum?
Replacing an old pool vacuum can be worth it if it's causing frequent clogs or poor suction. Newer models often feature improved filtration and energy efficiency, which can save you money in the long run.
What should I check during a pre-summer pool vacuum inspection?
During a pre-summer inspection, check for cracks or leaks in the vacuum hose, ensure the suction is strong, and verify that the filter is clean. Also, inspect the vacuum head for wear and tear.
How do I maintain my pool vacuum filter?
Maintain your pool vacuum filter by rinsing it regularly to remove debris. If it becomes heavily clogged, backwash or replace it as needed. A clean filter ensures better suction and longer equipment life.
What are the signs my pool vacuum needs repair?
Signs your pool vacuum needs repair include weak suction, unusual noises, and frequent clogging. If the vacuum head is damaged or the hose is leaking, it's time to replace or repair the unit to avoid further issues.


